Freezing Apples
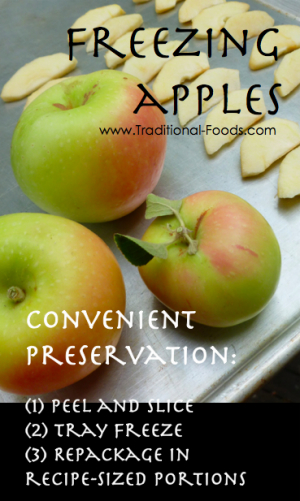
 Frozen apples are great to have on hand for pies, cakes, and other treats throughout the winter. The process is simple: peel and slice your apples, freeze them on a cookie sheet, and then put them in a plastic freezer bag for longer-term storage. That is the basic process, but we provide more detail here on what to do and how to use your frozen apple slices.
You may be tempted to sprinkle lemon juice over your apple slices to prevent the inevitable oxidation process that turns apple slices brown. The problem is that those apples that freeze the best are already tart. You could end up with far too much tartness in your end product. If whiteness in your cooking apple is important to you then choose a variety like Gala that does not really turn brown.
To peel and slice your apples, the quickest and simplest method of preparing the apples for freezing is one of those corer/peeler/slicer gadgets (we review such a gadget here). If you do much with apples, do yourself a favor and invest in one. For a discussion, watch the video or read the instruction below.
How to Freeze Apples
 Once your apples are ready just follow these easy steps:
- Spread your apple slices in a single layer on a cookie sheet.
- Place the cookie sheet into the freezer. The apple slices should be frozen through in a couple of hours depending on the temperature of your freezer.
- When the slices are stiff and frozen remove the tray from the freezer.
- Working quickly, pop the apple slices loose on place into a freezer bag.
- For best results, place two cups of apples in each bag so that you can easily find a recipe-ready quantity. (Certainly, you can measure them later when you are using them if that works better.)
- Squeeze as much air out of the bag as you can and seal.
- Flatten the bag onto another cookie sheet and return the frozen apple slices to the freezer. The bag will freeze in a shape that makes for easy stacking. You will probably do a number of bags so the stacking becomes an important point in the process of food preservation.
- Reload the first cookie sheet with apple slices and repeat the process. If you have plenty of room in your freezer, you could have three or four cookie sheets going at one time. If you are short on space, even a plate of apple slices freezing at any one time will eventually build you a good stash.
What Varieties of Apple Freeze Well?
Since the end result of a frozen apple slice is use in cooking, then you want a good cooking apple to start with. Generally these apples are a blend of sweet and tart. Some hold their shape through cooking and some do not. Some turn brown quickly and others do not. However, they all have stunning flavor after being cooked. For instance, a Jonagold is a beautiful and tasty apple to snack on and it is fabulous when turned into applesauce. The ideal apple for freezing is one that has both intense flavor and holds its shape. Fuji is one of those. Search out your local apple growers and you will find more. The video below provides some insight on selecting apples for cooking.How Do You Use Frozen Apple Slices?
- Pie: Handle your frozen apple slices just as you would use fresh slices for making apple pie or apple crisp. The apple slices are still a bit frozen when they go into the oven.
- Side dish: Drop a bag of frozen apple slices into a skillet with a tablespoon or two of water. Put on a lid and turn the heat to low. When the apples have thawed, add sugar and seasoning. Continue cooking until the apples are done and the contents of the skillet is thickening. Depending on the amount of sugar you added, these apple slices could be a side-dish to meat or the base of an easy dessert.
- Dessert: Using the cooking method above, scoop the cooked apple into small bowls. Top with whipped cream and some crushed nuts.
- More dessert: Soften a flour tortilla with melted butter in a skillet. Place the tortilla on a plate and add a couple tablespoons of the apple mixture to one side of the tortilla. Roll up the tortilla. Drizzle honey-butter over the top and garnish with a dollup of sweetened sour cream. I discovered this years ago on a trip to San Diego, have not found it since except in my own kitchen. Anyone who has had it raves.


0 comments:
Post a Comment