

Latest Article Get our latest posts by subscribing this site
NO CRUST PIZZA #2
Chicken Crust Pizza

Cooking Steps
Flatten the chicken as thin as you can between two pieces of wax paper. Use a meat tenderizer or a rolling pin for this, and then remove wax paper. Place chicken on a baking sheet sprayed with olive oil cooking spray. Brush chicken with extra virgin olive oil. Broil for 1.5 minutes on each side. Take out and top with sauce and toppings. Bake for about 10-15 minutes at 350*F until cheese is slightly brownedIngredients
DINNER TONIGHT ROAST CHICKEN
Roasted Chicken Legs with Bacon Veggies

Cooking Steps
Preheat oven to 400 degrees.Slice the carrots into evenly sized sticks. Halve and slice the onion. Using a garlic press, crush the garlic cloves. Cut the cauliflower into large chunks. Combine all vegetables into a large roasting pan. Mix in chopped bacon. Pour 2 tablespoons of olive oil over the mixture and top with 1 teaspoon salt, 1/2 teaspoon pepper, and 1/2 tablespoon Italian seasoning. Mix well.
Lay the chicken legs on top of the vegetables. Sprinkle the chicken with remaining 1 teaspoon salt, 1/2 teaspoon pepper, and 1/2 tablespoon Italian seasoning. Cover and roast for 50-60 minutes, until the chicken is cooked through and the vegetables are tender.
Ingredients
- 5 large carrots, sliced into sticks
- 1 large onion, halved and sliced
- 2 cloves garlic, crushed
- 1 head cauliflower, cut into large chunks
- 1/2 pound bacon, cut into pieces
- 2 tablespoons olive oil
- 2 teaspoons salt, divided
- 1 teaspoon pepper, divided
- 1 tablespoon Italian seasoning, divided
- 5 whole chicken legs
Paleo Chicken Fajitas

The Best Chicken Fajitas You’ll Ever Eat
Serves 4-6Ingredients:
- 1.5 – 2 lbs. of “pastured” organic chicken breast
- 1 medium jicama (peeled and sliced into strips)
- 1 red bell pepper (sliced into strips)
- 1 orange bell pepper (sliced into strips)
- 1 yellow bell pepper (sliced into strips)
- 1 large sweet onion (sliced into strips)
- 2 heads of Bibb or Butter lettuce
- Cumin, chili powder, freshly ground black pepper (liberal amounts of each)
- Sea salt to taste
- 1 bunch fresh cilantro (chopped)
- Trim and pound chicken with a meat tenderizer until all slices are a consistent thickness.
- Heat 1-2 tbsp of coconut oil in a pan (medium-high heat).
- Once the oil is hot, mix spices together and sprinkle half directly into the pan.
- Throw chicken on top of the spices, and sprinkle the other half of the spice mixture on top of the chicken.
- Allow each side to blacken and sear (about 1 minute) before flipping.
- When chicken is done, remove from pan and transfer to cutting board to slice into strips.
- In the same hot pan (with leftover spices), sauté the peppers and onions.
- Use the spatula to scrape blackened spices off the bottom of the pan, stir them right in with the veggies.
- When pepper and onion mixture is cooked to desired tenderness (3-5 minutes), remove from pan and transfer to serving dish.
- Fill the bottom of your plate with large leafs of lettuce. Pile hot peppers, onions and chicken on top.
- Serve with fresh guacamole and salsa, garnish with sliced jicama and freshly chopped cilantro.
Taco Bowl from Mark's Daily Apple
Taco Bowl with Crispy Kale Chips
 One-bowl meals, like this taco bowl, are a great example of achieving maximum flavor with minimal effort. When all the ingredients for a meal are piled on top of each other in a bowl, every bite brings a delicious new combination of flavor. Plus, every bite is packed with protein, healthy fat, and a variety of vegetables. And, it’s ridiculously easy to make.
Start by mixing up a batch of taco seasoning. It’s a bold but not overpowering spice blend that can be used to season any type of meat, or vegetable for that matter. Double the recipe if you like, then store extra in your spice drawer to season other meals.
Next, slice up a variety of peppers and an onion and saute them in the same pan as the seasoned meat. Then gather up your garnishes. Avocado and tomato are a must for a taco bowl. Baked kale chips are optional, but add the perfect crunch. You could stop there if you wanted to, but why? The beauty of a one-bowl meal is that the more ingredients you add, the better it tastes. Cilantro, mixed greens, salsa, grated cheese, sour cream, black olives, green onions…dig through your kitchen and add whatever sounds good.
Pile everything high in a bowl, grab a fork and sit down to eat. In 20 minutes or less you’ve just made an incredibly delicious meal without breaking a sweat.
Servings: 3-4
Ingredients:

Taco Seasoning
- 1 tablespoon chili powder
- 1 teaspoon cumin
- 1 teaspoon paprika
- 1/2 teaspoon coriander
- 1/4 teaspoon onion powder
- 1/4 teaspoon garlic powder or a few minced garlic cloves
- 1/2 teaspoon salt
- 1/2 teaspoon black pepper
- 1 pound of ground or thinly sliced meat
- 1 to 2 onions, thinly sliced
- 3 bell peppers, sliced
- 1 or 2 other peppers such as Anaheim, poblano or jalapeno, sliced (optional)
- 2 avocados, sliced
- 2 to 3 tomatoes, roughly chopped
- 1 small head of kale
- Optional garnishes: cilantro, mixed greens, cheese, sour cream, salsa, green onions, black olives, etc.
Mix together the taco seasoning spices. Set aside.
To make the kale chips, preheat the oven to 300 degrees Fahrenheit. Remove the stems and separate the leaves from the tough center rib. Rip or cut the leaves into small pieces then toss with olive oil and a few pinches of taco seasoning. Bake the leaves in a single layer – this is important because if you crowd too many into one pan they won’t get as crisp. Bake for about 20 minutes until leaves are crisp and easily crumble.

While the kale chips bake, sprinkle the rest of the taco seasoning on the meat.
In a large skillet over medium-high heat warm a few tablespoons of oil and saute the onion just a few minutes. Add the bell peppers to the skillet. Saute about five minutes more until the onion and peppers are brown around the edges and a little bit soft.
Add the meat. Saute with the veggies until cooked.

In serving bowls, combine the meat, peppers and onion with avocado and tomato. Top with kale chips and other garnishes.

What is Tabata?
TABATA
Tabata is the name of a Japanese researcher who discovered a way to increase both anaerobic and aerobic pathways at the same time. It's an excellent training program that seems to fit across all training disciplines for athletes looking to increase their VO2max and lose fat quickly.What is it?
It's simple: after warming up, take one exercise and perform it in the following manner:- For twenty seconds, do as many reps as possible, or run, bike as hard as you can
- Rest for ten seconds
- Repeat seven more times!
The best exercise options for the Tabata method are exercises that use a large number of muscles such as, squats, front squats, dead lifts, thrusters, sprints, stationary bike and rowing machine.
Use the "lowest rep number" of any of the eight sets as your measurement to compare workout to workout. If you go too heavy, that last set may be two. If you go too light, you might get around 15 reps or more.
And by the way, ten seconds is not getting a drink, looking in the mirror, talking to the cute girl on the bike, looking at the clock, walking back to the bar, chalking up, adjusting the belt, talking to a friend, then doing the next set. Ten second is ten seconds! No cheating!
Why should you do this workout?
The Tabata program might be the single best "fat burning workout" that I know, not to mention the increase in VO2max. It might only be four minutes, but you seem to keep sweating and breathing hard for a long time afterwards. Tabata truly teaches a person the mental focus needed to push and to help reach their athletic goals.Using a GYMBOSS makes timing Tabata intervals easy. Simply set the timer to a work interval of 20 seconds followed by a rest interval of 10 seconds alarming with your choice of beep, vibrate, or both! The timer continues these intervals until you stop!! Or drop!!!!
HIIT Training-My Favorite Way to Workout
What Is HIIT?
High intensity interval training, or HIIT training, is an interval workout that has been around for decades. The HIIT routine includes intervals of high intensity exercises, followed by recovery intervals of light to moderate intensity exercises. Due to the fact that this training involves pushing yourself to do intense exercise intervals, the HIIT workout can provide many advantages that the usual exercise routines cannot offer including, aerobic, anaerobic, muscular endurance, and fat burning like never before.What exercises can be used for a HIIT Routine?
HIIT exercises can be very specific programs, or just traditional exercises, depending on your specific goals and your current physical condition. Here just a few samples you can consider for your HIIT training:| Running | Sprinting | Biking | Stairmaster |
| Treadmill | Elliptical | Weight Training | Kettlebell |
| Box Jumps | Thrusters | Pushups | Power cleans |
| Sled pulling | Jump rope | Polyometrics | Anything else |
Whether you are at the gym, on the track, in your house, yard, or on the road a HIIT workout can be completed with great success. Any activity can be used for HIIT training, the idea is to go intense for a set amount of time doing any activity you want followed by a recovery period, and repeat as many sets necessary to meet your goals.
Throw boulders around your yard, run on a treadmill, sprint around the track, up a hill, or through your hood. Pound on an old tire with a sledgehammer, throw the old tire as far as you can, as high as you can, against the wall as hard as you can, as many times as you can in 30 seconds then rest 10 seconds. Repeat, Pick up the heaviest thing you can find and walk around with it for 30 seconds then rest and repeat. Lift that 70 lb punching bag up over your head as many times as possible for 30 seconds, then take 20 seconds off, repeat 10 times. Push your car down the driveway for 30 seconds, rest 30 seconds, and then repeat 20 times.
I think you get the point of HIIT training by now!
What are the interval lengths?
This depends on your current conditioning level and your specific workout goals. Starting with a few repeats of shorter intervals of work and longer intervals of rest and over time as your condition improves you can increase the work interval duration, decrease the recovery interval, and increase the number of sets to meet your goals.The flexibility of the GYMBOSS timer allows you to set any 2 intervals of your choice from 2 seconds to 99 minutes, you can start your HIIT workout routine with precise work interval and rest interval time periods, and slowly increase or decrease as you see fit. Using the GYMBOSS interval timer you also set the number of repeats that you desire allowing you to focus on your workout, not the clock.
You decide what your work and rest intervals are, set the number of repeats you want to accomplish, and you will get the best possible HIIT workout in the least amount of time burning more calories and fat than ever before.
Clipped to the waistline of your shorts, armband, back of your hat, or held in your hand, clip to the weight rack, the loud beep and vibrate alarms are easy to recognize signaling time to start or stop your intervals allowing you to focus on your workout and get results like never before.
These are just a few sample HIIT workout samples:
- Tabata
20 seconds work, 10 seconds rest, for 8 rounds. A 4 minute killer HIIT routine! - Sprint
5 minute warm up
20 seconds fast run, 40 seconds walk for 5 repeats
30 seconds fast run, 30 seconds walk for 5 repeats
1 minute fast run, 30 seconds walk for 5 repeats
5 minute cool down
(Say goodbye to boring runs!) - Weightlifting
Set timer to 1 minute interval for 30 repeats and start a set at every alarm using weight as necessary to complete 15 reps per set. (You’re going to sweat while everyone else in the gym is standing around talking!)
HIIT Training is Best for Oxygen
Oxygen Debt | The Excess Post-Exercise Oxygen Consumption Effect
 Brad Taylor
NaturalSociety
Everyone knows that exercise leads to a healthy body, strong muscles, reduced stress, and weight loss. But what many people don’t consider is what happens on an internal level after exercise is complete. The number of techniques or strategies which could be implemented into your workout for greater achievement is endless. Some people think that steady, long, low-intensity workouts provide the best results, but this isn’t true. Jogging is a healthy activity, and walking may even be better, but rigorous exercise has a more profound impact on an effect that occurs in your body following exercise known as excess post-exercise oxygen consumption in order to take care of what’s referred to as oxygen debt.
Excess Post-Exercise Oxygen Consumption
EPOC refers to the rate of oxygen consumed in order to return to a homeostasis state and ‘fix’ the body’s oxygen debt. Although a light worker does trigger EPOC, the effect is bound to be more powerful and continue for a longer period of time after a vigorous workout. After performing a low-intensity workout, the body’s demand for oxygen simply isn’t as pertinent.- Stomach Weight Loss Tips www.TrueResults.com/Lap-BandOutpatient Surgery Available Now. Free Insurance Verification.
- Strength Training Workout www.Precor.com/StrengthTrainingGym-Quality Strength Equipment Find a Store Near You & Buy Today!
- Workout Plans www.dailyfitnesscenter.comGet Workout Challenges, Nutrition Tips & More- Free Download!
- #1 Way to Build Muscle www.ForceFactor.comMen of All Ages are Seeing Results With This One Trick. Try It Today!
Oxygen Debt and the Effect of EPOC
In addition to returning to a homeostasis state, the body releases energy at a higher rate. During this time period, the body begins to restore itself.- Replenishing it’s Energy Resources – Your body needs to replenish it’s energy, especially immediate sources of energy. To do this, your body taps into what’s known as the phosphagen system and restores the creatine phosphate and ATP. In addition, lactic acid is being reconverted to glucose, and muscle glycogen levels are being restored during this process.
- Re-oxygenating the Blood & Renewing Circulatory Hormones - Energy is expended in order to re-oxygenate the blood for excess oxygen use. In addition, circulatory hormones which become elevated after exercise return to normal levels.
- Decrease in Temperature – Energy is expended in an attempt to go back to normal body temperature.
- Rebound to Normal Heart Rate – In an attempt to return to a normal heart and breathing rate, the body expends energy at an increased level.
When is oxygen debt mostly experienced?
Research suggests that maximal EPOC response is generated through the following list with 1 being the most effective method and 3 being the least effective method. In terms of EPOC response, the amount of elevation of oxygen consumption and the lasting effects are based on the length and intensity of the workout. Here are ways to ignite higher EPOC response.- Highly intense resistance workouts
- Highly intense cardiovascular workouts
- Highly intense cardiovascular workouts revolving around interval training
There are certain aerobic exercises such as cycling that may bring forth a lesser magnitude (amount of increased oxygen consumption) and duration (length of increased oxygen consumption) of EPOC than heavy weight training based on research conducted.
Additional sources:
Read more: http://naturalsociety.com/oxygen-debt-the-excess-post-exercise-oxygen-consumption-effect/#ixzz1zHRN4oCR
Hormones:Progesterone Cream
Natural Progesterone creme
routinely fed and/or injected into live stock to fatten them up for market. Petrochemical companies produce types of environmental pollution that act as estrogen in the human body. Hormone imbalances create an array of symptoms;
many associated with PMS, menopausal symptoms, bone loss and adrenal exhaustion. These imbalances may be put in check by the use of natural progesterone.
Progesterone is a hormone produced by the ovaries and adrenal glands. Natural progesterone USP from wild yam is bio-identical to the progesterone that the human body produces. Today, women are realizing the immediate
and long-term benefits of using natural progesterone creme and herbs. Dr. John R. Lee MD, physician and author, writes that natural progesterone creme in applications of 20-30 mg is giving relief to women expressing symptoms of
estrogen dominance.
WHY DOESN'T MY DOCTOR PRESCRIBE NATURAL PROGESTERONE?
Organized medicine and pharmaceutical manufacturers have an age-old relationship. This is not to imply any evil or corruption. Pharmaceutical companies are interested only in medicines that they may patent for a profit. Just like
anything natural, natural progesterone cannot be patented. Doctors are required to prescribe products only from the pharmaceutical manufacturers.
WHY A CREME? Natural progesterone taken orally is mostly destroyed in the digestion process. Adequate absorption is only accomplished through topical application in the form of a dermal delivery system. At Radiant LaboratoriesTM, years of experience combine clinically tested skin care ingredients with micronized natural progesterone USP. Natural RadianceTMis a non-comedogenic cold processed liposome creme that isfree of toxic chemical emulsifiers, isopropyl palmitates, glycerl stearate, octyl palmitate, stearic acid, DEA, triethanolarmine (TEA), dimethicone, cyclomethicone, PEG, alcohols, emulsifying wax, dyes, parabens, colors or mineral oil.
We use Lanol (vegetable ester), blended with Aloe Verain a Transdermal Delivery System.Lanol is one of the finest cosmetic moisturizers and reputed to maintain youthful appearance. Aloe vera is world renowned for its capabilities
to hydrate the skin. Desired ingredients such as progesterone, estriol and herbal concentrates are used in a cold processed creme, giving a superior consistent absorption rate.
Hormones:Testosterone Cream for Women
Testosterone Cream for Women
What is testosterone cream?
Testosterone cream for women is one of the most sought-after products, which helps the female species increase sexual enhancement through a very practical and easy way. Compared to taking drugs or any forms of medication to increase the female sexual urge, the testosterone cream can be applied to the skin, which gives rapid sexual enhancement.
Why use testosterone cream?
Most people don’t realize that a woman has testosterone levels just as a male does, just in different amounts. A female’s body balances the levels of estrogen, progesterone, and testosterone, with the ovaries producing the testosterone. Some of the symptoms they experience from low levels of testosterone are dry and thin skin, inflammation of the vagina with painful intercourse, and gaining body weight. Many medical professionals believe that treating the female body with male hormones will cause acne, hair loss, or will make the person look more masculine. But careful therapy can avoid these side effects and make a person feel much more alive and active.
How does it work?
The cream works by allowing the body to increase the secretion of sex hormones upon application of the cream. The effect is quite rapid and direct since the testosterone cream could easily be absorbed through the skin and pass through the blood vessel of the female user. From here, the testosterone would act on the specific glands involved increasing the secretion of sex promoting hormones. Unlike the defective and ineffective creams and medications sold around the internet, the testosterone cream for women has a scientific basis regarding the mechanism of its action. Many large and successful drug companies have clinical findings regarding the t cream to support their product advertisements and commercials. Women who are in need of such medications and have used the testosterone cream as a sexual stimulant are safe and free from any hazardous effects.
What products exist?
There are several testosterone creams out there for women such as Libido Edge, Natural Radiance, BioEntopic, etc. But there are only a few out there that are affordable and effective. So be careful when searching for the right testosterone cream.

My Mission
My ultimate mission is to find the best testosterone cream that exists for women. I will then update you on how it is working. I did some research and found a product that seems more promising than the rest. It is called, VieNue Bioidentical Testosterone Cream. I have just recently made my purchase. I am very excited to see the results of this mission and hope you will keep updated.
Here’s a link:
VieNue Testosterone Cream
Vienue also makes an acai berry supplement:
Vienue Acai Berry Supplement
Testosterone cream for women is one of the most sought-after products, which helps the female species increase sexual enhancement through a very practical and easy way. Compared to taking drugs or any forms of medication to increase the female sexual urge, the testosterone cream can be applied to the skin, which gives rapid sexual enhancement.
Why use testosterone cream?
Most people don’t realize that a woman has testosterone levels just as a male does, just in different amounts. A female’s body balances the levels of estrogen, progesterone, and testosterone, with the ovaries producing the testosterone. Some of the symptoms they experience from low levels of testosterone are dry and thin skin, inflammation of the vagina with painful intercourse, and gaining body weight. Many medical professionals believe that treating the female body with male hormones will cause acne, hair loss, or will make the person look more masculine. But careful therapy can avoid these side effects and make a person feel much more alive and active.
How does it work?
The cream works by allowing the body to increase the secretion of sex hormones upon application of the cream. The effect is quite rapid and direct since the testosterone cream could easily be absorbed through the skin and pass through the blood vessel of the female user. From here, the testosterone would act on the specific glands involved increasing the secretion of sex promoting hormones. Unlike the defective and ineffective creams and medications sold around the internet, the testosterone cream for women has a scientific basis regarding the mechanism of its action. Many large and successful drug companies have clinical findings regarding the t cream to support their product advertisements and commercials. Women who are in need of such medications and have used the testosterone cream as a sexual stimulant are safe and free from any hazardous effects.
What products exist?
There are several testosterone creams out there for women such as Libido Edge, Natural Radiance, BioEntopic, etc. But there are only a few out there that are affordable and effective. So be careful when searching for the right testosterone cream.
My Mission
My ultimate mission is to find the best testosterone cream that exists for women. I will then update you on how it is working. I did some research and found a product that seems more promising than the rest. It is called, VieNue Bioidentical Testosterone Cream. I have just recently made my purchase. I am very excited to see the results of this mission and hope you will keep updated.
Here’s a link:
VieNue Testosterone Cream
Vienue also makes an acai berry supplement:
Vienue Acai Berry Supplement
CHOCOLATE STRAWBERRIES-THX KEIRSTEN!

And you know you can fill it up with dried fruit or nuts or bluberries!
THANK YOU KEIRSTEN FOR THE POST!!!
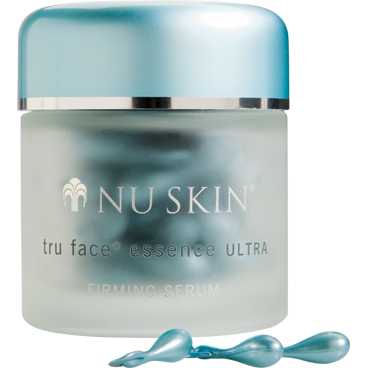
Nu Skin tru face essence ULTRA-My Review
I received this and many other samples from a lovely,patient lady.A company that I have been demostrated on a few years back at an Anti-Aging Conference(A4M).The Galvanic Spa but that is in the future when I do get my hands on one and do before and after pictures.YOU to will be convinced and want one too.
Well this is one of the lovely products that it took once to use and love and angels fell out of the sky onto my skin..Kidding!To me it takes a few jars for certain products to see a difference or some instant and others days..Just depends on the ingredients and how your skin reacts.I fell in love with smoothness that the rest of my products went on after I popped one of the cute little capsules. Especially how my foundation looked..I have dry skin so matte stuff doesn't work with me.My face felt and looked smoother instantly. I need moisture and dewy.I have posted many great essential oils that are great in skin and supplements to take.But certain companies can just combine the right ingredients to perfection. I have to give this a 9.I would give it better but the price is up there. But for good skincare to me it is worth it if you can afford it. The price is about 163.50 for 60 capsules day and night. I have a Rep who can help you if you are interested. The ingredients are further down. You may be shocked about the price but trust me I have not even told you about the other products that I cant believe I shelled out(500) for creams that didn't do any better than other drugstore or department store brands.I have another review tomorrow on the Line Corrector.OH and the product and be sold retail at 130.80 through the rep I know..So worth it...I love how my skin looked.
-Tiffany
WHAT IT DOES AND ITS BENEFITS;
- Promotes skin firmness and elasticity and fights current signs of aging with Ethocyn®, an ingredient clinically proven to improve skin elastin content.
- Helps prevent degradation of elastin with elastase inhibitors.
- Contains Tègreen 97, CoQ10 and colorless carotenoids, a complete protective antioxidant network that helps prevent future signs of aging by protecting against skin-aging free radicals
- Helps contour and firm the skin for a more youthful appearance.
- Defines skin around the eyes, neck, chin, jawline and décolleté and hands.
THIS IS THEIR MONEY BACK GUARANTEE;
STEP 1: Take a picture of your face before using Tru Face Essence Ultra with a newspaper in the picture that shows the current date.
STEP 2: Put Tru Face Essence Ultra on Automatic Delivery program.
STEP 3: Use Tru Face Essence Ultra twice a day as directed.
STEP 4: After using Tru Face Essence Ultra for eight weeks, take another picture of your face, as similar as possible to the one you took previous to using the product.
You Can Reach Your Goals
Why the Way You Think is the Cornerstone of Reaching Your Health Goals
NaturalSociety
 The mind is powerful – much more powerful than many individuals recognize. If you were to harness the potential of this energy transmitter in your head, then great feats could be reached far beyond what can currently be conceived. Scientists have already proven that your thoughts are powerful determining factors in your overall health, and that your mindset can ultimately create — or delay — self-healing. Whether it be thinking your way to wellness, or simply coming to a realization that you are fully capable of being healthy, the road to such successes is not a difficult one to travel. In fact, even the key to powerful fat loss can also be found in the way you think.
Changing the Way You Think is Fundamental in Attaining Great Health
Attaining superb health does not start with diet or exercise, but rather a mere thought. Consciously noticing how you think and what patterns are embedded in your mind is the absolute first and most fundamental step in reaching a 10 on the health scale. Having been exposed to 10′s of thousands of food advertisements while growing up as a child, it is easy to see how easily the mind, conscious, and subconscious can be affected. The fact of the matter is that living an unhealthy lifestyle and eating unhealthy foods is quite standard thanks to this marketing assault by the food industry. After being subject to the advertisements, negative influences, identity issues, and consistent doubts about the strength of your willpower for so long, anyone’s way of thinking would be deeply altered. To already healthy-thinking individuals and those who have endured the hardships while reaching for that state of healthy-thinking, living a healthy lifestyle is not only done with the utmost simplicity, but they love it. As for individuals who grew up around unhealthy-thinkers, trying to be healthy is a prodigious challenge.
If you are struggling to accelerate your quest to optimum health, then you can be sure that a change in thinking is the first step to fulfilling this mission. Altering diet or engaging in exercise can improve your health dramatically, but the improvement will not be everlasting if you’re struggling to keep the momentum. You need to ask yourself: do I want this, or do I want to want this? In other words, you need to ensure you really want to embark on the necessary path to health revolution, ultimately experiencing the beneficial end result of the health transformation. Truly wanting great health will result in all of the activity leading to your goal being enjoyable, while only longing for the end result leaves you feeling with a sense of struggle.To truly desire great health, try visualizing what your life and body would be like once you have it. Think about how you would look and feel after having achieved your short-term goal, and then think about it again after having achieved a long-term goal. Want to kick it up and notch and really amplify progress? Imagine you are incredibly healthy and have the perfect body in the present. Feel the feelings that would be running through you if you had exactly what you wanted right now. By visualizing and imagining you have the health you want right now on a daily basis, you are training yourself to achieve that goal consciously and subconsciously.
If you want things in your life to change, you have to actually change things in your life. Change starts with a single thought which leads to a single life-changing decision
Read more: http://naturalsociety.com/why-way-you-think-cornerstone-reaching-health-goals/#ixzz1zCLREelh
Paleo Spice Rub Crockpot Chicken

Spice Rub Crock Pot Chicken
1 5-6 lb free range organicchicken- gibletsremoved,rinsed, and patted dry with paper towels
1white onion sliced
1 tsp sea salt (optional)
2 tsp paprika
1 tsp cayenne
1 tsp white pepper
1 tsp poultry seasoning
1 tsp garlic powder
Cover the bottom of the crock pot with the sliced onions. Mix all spices in a small bowl and then rub the spice mixture all over the whole chicken. Place the spiced chicken on top of the onions in the crock pot, cover and cook on low for 5-6 hours (depending on your crock pot). No need for any liquid, the chicken will cook in it’s own juices. Make sure you spoon the onions and a little bit of the juices over the chicken when you serve it. I served my chicken with our favorite brussel sprouts, steamed for 5 minutes and then sauteed with a little olive oil, dried dill, garlic powder, and pepper.
Enjoy!
Coconut Milk Kefir
Ingredients:

- 1 tablespoon of kefir grains
- 1 can of coconut milk (or 1-2 cups of refrigerated coconut milk)
If the kefir grains are dehydrated (as they are from most online sources) you must first re-hydrate them in cows’ milk. Combine the grains with 1 cup of cows’ milk and set out at room temperature in a loosely covered glass container. For 5-7 days, strain the grains out each day and then place them in a fresh cup of milk. When the batches of milk take on a slight fermented smell and thicken, your grains are ready.

Combine the grains with coconut milk in a glass container. Cover with a cloth secured with a rubber band and let sit in a warm place (68-85 degrees) for 12-24 hours. Once the coconut milk has thickened and has a slightly sour flavor, it has turned into kefir. Remove the grains, refrigerate and enjoy!
Place the grains in new milk at room temperature to start a new batch of kefir (made from either coconut milk, or cow or goat milk) or store the grains in a cup of cows’ milk in the refrigerator. The grains can be used indefinitely to make kefir, however, if you store the grains in the fridge instead of continuously making kefir, it may take a few batches to get them going again.

Helpful Tips
- If your first batch of coconut milk kefir doesn’t get as thick or tangy as you’d like, don’t despair. It can sometimes take a few batches to acclimate the kefir grains to coconut milk.
- Don’t store the grains in coconut milk between batches. Store them in cows’ milk.
- Never use a metal container to make kefir or a metal spoon to stir it – this disrupts the process and the kefir won’t thicken. Use glass containers (canning jars work well) and wood or plastic spoons.
- If your kefir doesn’t thicken with 24 hours, it might be that the temperature in your house isn’t warm enough.
- If your kefir hasn’t thickened at all within 48 hours, throw out the milk and start again by putting the grains in a fresh batch of milk.
- Kefir should have a fermented aroma and can sometimes have a slight effervescence, but it shouldn’t smell foul or unpleasant.
Grab a copy of Primal Blueprint Q
Apple Salsa

Fresh Apple Salsa
Print Recipe
For Salsa:
2 cups diced Fuji apple, about 2 medium apples
1/2 cup diced red bell pepper
1/3 cup fresh lime juice
1/4 cup diced red onion
1/4 cup minced fresh cilantro
1 tablespoon honey
1/4 teaspoon salt
1/4 teaspoon freshly ground black pepper
Instructions:
Combine all ingredients and serve.
Quick Paleo Meals
Quick Paleo Meals

Steak & eggs
Steak and eggs are two of the cornerstones of the paleo diet so why not enjoy both together for even more goodness. This combination though is not new and steak & eggs have been enjoyed for a long time, either in the morning for breakfast or at night for dinner. It also coulnd’t really get simpler than this. This is a single recipe, but calculate about two eggs per steak. You can enjoy your eggs pretty much the way you like them usually, but in this recipe the classic sunny side up eggs are prepared. I like to make it so the yolks are still runny and can drip on my steak, enhancing flavor and texture at the same time.Ingredients

- 1 good quality large steak (filet, surloin, ribeye, …);
- 2-3 tbsp of your favorite cooking fat (tallow, butter or ghee are excellent here);
- 2 free range eggs;
- Paprika to taste;
- Salt and pepper to taste;
Preparation
- Note: Let stand your steak for about 40 minutes at room temperature for a perfectly cooked and juicy result.
- Heat a pan over medium-high heat and add 2 tbsp of your chosen cooking fat.
- Season your steak with sea salt and freshly ground black pepper and add to the hot pan.
- Cook the steak to your likings. About 3 minutes of each side will usually give you a nice and medium rare steak.
- Remove the steak from the pan, set aside and lower the temperature to medium-low. Add the rest of the cooking fat.
- Crack open the eggs in the hot pan, cover, season to taste with some paprika, salt and pepper and cook until the whites are just set.
- Serve the steak with the eggs either on top or on the side and make sure to dip the juicy hot meat in the runny yolk for complete satisfaction.

Paleo Chicken Fajitas
Fajitas are a classic in Tex-Mex cuisine and are adored universally by kids and adults alike. The classic fajita calls for skirt steak and is served with a choice of toppings over corn or flower tortilla, but this paleo take on the classic fajita meal is just as delicious without the tortilla. Today, fajitas are also commonly prepared with pork, chicken or shrimp and the usual vegetables include bell peppers and onions. Enjoy making a big batch and pleasing the whole family with this classic do it yourself dinner. This recipe serves about 5 people, but be sure to make more for leftovers.Ingredients
 3 lbs chicken breast, cut in thin strips;
- 3 bell peppers;
- 3 onions, sliced;
- 2 tbsp oregano, chili powder, cumin and coriander;
- 6 chopped garlic cloves;
- Juice of 5 lemons;
- 4 tbsp cooking fat (coconut oil, tallow or ghee are excellent here);
- Butter lettuce to serve;
- You choice of toppings: diced tomatoes, fermented pickles, sauerkraut, sliced avocados, salsa, guacamole, mayonnaise and/or salsa verde;
Preparation
- Combine the chicken, bell peppers, onions, spices, garlic and lemon juice in a bowl and mix well;
- If preparing ahead of time, let marinate in the refrigerator for about 4 hours.
- When ready to cook, heat a large skillet on medium heat and cook the whole preparation with the cooking fat until the chicken is cooked through and the onion and bell pepper are soft.
- Put the hot chicken preparation in a large bowl and let the people prepare their own fajitas on top of lettuce leaves with their favorite toppings.
Bacon, spinach & mushroom casserole
This is a very simple dish all prepared in a single casserole and using some traditional favorites like bacon and mushrooms. Spinach brings everything together and helps create a very filling and savory dish. The rendered bacon grease created during the cooking process will help cook and give taste to the spinach and mushrooms.Ingredients
- 2.5 lb good quality smoked bacon, cut into medium sized strips;
- 3 big handfuls of fresh spinach, stems removed;
- 1 lb button mushrooms, sliced;
- 1 large onion, chopped;
- 2 garlic cloves, minced;
- 2 tbsp lard, butter or ghee;
- Salt and pepper to taste;
Preparation
- Heat a large casserole over a medium heat and cook the bacon, making sure it’s still soft.
- Add the onion and cook until soft, about 5 minutes.
- Add the garlic and cook for about a minute, until fragrant.
- Add the mushrooms and cook for about another 8 minutes, until soft.
- Add the spinach and butter, cover and let cook for another 4 minutes, stirring occasionally, until the spinach is well cooked.
- Season with salt and pepper and serve.
Baked salmon with asparagus & roasted beets
Beets and asparagus are two vegetables that go wonderfully well with salmon and that tend to be forgotten in our day to day meals. This simple dish can of course be prepared with any fresh fish and vegetables. This recipe serves 4 people.Ingredients

- 4 fresh wild salmon fillets;
- 4 tbsp butter or coconut oil;
- 4 tsp chopped dill;
- 16 sprigs of fresh asparagus, hard base removed;
- 4 medium red beets, cut in cubes;
- Salt and pepper to taste;
Preparation
- Preheat your oven to 500 F.
- Line four large pieces of foil and place a salmon fillet on a bed of beet cubes and 4 asparagus. Do that for the 4 fillets.
- Add 1 tbsp of butter and 1 tsp dill on top of each fillet and close the foil to form a little pocket.
- Bake in hot oven for about 10 minutes for each inch of thickness of the fish.
- Make sure to check on the fish so it doesn’t get overcooked.
- Serve topped with some more of your favorite fresh herbs. More dill is perfect, but cilantro is also really good.
Chicken & zucchini hot salad
This is a very simple hot salad featuring chicken and zucchinis, two items that go hand in hand with a lemon and garlic mayonnaise. Serves 4 people.Ingredients
- 2.5 lb chicken breast, cut into cubes;
- 5 zucchinis, cut into cubes;
- 3 tbsp coconut oil, butter, ghee or lard;
- 1 tbsp oregano;
- 1 large onion, chopped;
- 7 tbsp homemade mayonnaise;
- Juice of 2 lemon;
- 2 cloves garlic, minced very finely;
- 1 head romaine lettuce, washed and shredded;
- Salt and pepper to taste;
Preparation
- Heat a large pan over a medium-high heat and cook the chicken cubes until well cooked. Set aside
- In the same pan, with the rest of the cooking fat, add the onion and cook until soft, about 5 minutes;
- Add the zucchini cubes and oregano and season with salt and pepper. Cook until the zucchini cubes are soft.
- In a bowl, mix the mayonnaise, lemon juice and garlic.
- Add the hot and cooked chicken, onion and zucchini to the mayonnaise preparation and mix well.
- Add the romaine lettuce, mix well and serve in bowls. This hot salad is delicious topped with some fresh almonds.
Sausages with parsnip mash & mushrooms
Bangers and mash are a classic English dish, but you don’t have to indulge in potatoes to enjoy some delicious mash. Sweet potatoes, or, as in this recipe, parsnip, is also perfect. Of course, this meal is high in carbs than most paleo preparations, but from a natural source and in a reasonable quantity, it shouldn’t be any problem. This meal is especially great as an after workout meal or when you need some quick energy for the rest of your day. This recipe serves about 6 people.Ingredients
 12 large good quality beef or pork sausages;
- 2 garlic cloves, minced;
- 2 lb parsnip, coarsely chopped;
- 2 tsp cooking fat;
- 5 tbsp butter or ghee;
- 1 lb button mushrooms;
- 1/2 cup coconut milk or heavy cream;
- 2 tbsp chopped fresh oregano;
- Pinch of nutmeg;
- Salt and pepper to taste;
Preparation
- Boil the parsnips for about 15 minutes, until soft.
- Drain the water, add half the butter, the coconut milk or heavy cream, a pinch of nutmeg and salt and pepper to taste and mash well with a potato masher. You can also use a food processor for convenience. Reserve the mashed parsnips in the covered pot so they stay warm.
- Heat a large skillet over medium heat and cook the sausages in a large skillet with the cooking fat for about 15 minutes, turning occasionally.
- Set the sausages aside and add the mushrooms to the already hot skillet with the other half of the butter. Cook until well browned, about 5 minutes and add the chopped oregano.
- Serve the mashed parsnips covered with the sausages, mushrooms and all the drippings.
Canned salmon salad
It’s not because it comes from a can that you can’t prepare something really delicious out of canned salmon. After all, we are fortunate enough that farmed salmon doesn’t hold well to the canning process so we are blessed with an easy and cheap source of wild salmon your-round. In this recipe, I use olive oil and lemon juice, but homemade mayonnaise are also excellent.Ingredients

- 2 cans wild salmon;
- 2 diced cucumbers, peeled or not;
- 1 chopped onion;
- 1 large diced tomato;
- 1 diced avocado;
- 5-6 tbsp extra virgin olive oil;
- Juice of 2 lemons;
- 2 tbsp chopped fresh dill, optional;
- Lettuce leaves for serving;
Preparation
- Drain the liquid from the canned salmon, place the salmon in a bowl and mash well with a fork.
- Add the lemon juice and olive oil and mix well into the salmon.
- Add the cucumbers, onion, tomato and avocado and mix again.
The Power of Red Onions

(NaturalNews) Onions are one of the most popular vegetables worldwide. While most children dislike their pungent and bitey flavor, most adults embrace and use them regularly. Red onions contain twice as many anti-oxidants as any other form of onion, making them a powerful part of an anti-inflammatory diet and lifestyle.
Red onions get their bite from the many sulfur groups they contain. These sulfur groups include the diallyl sulfides: DMS, DDS, DTS & DTTS. These sulfur groups help produce cysteine within the body that aids in weight loss and detoxification. Additional research has shown that sulfur compounds have a strong anti-capacity that inhibits blood cell clumping.
The sulfur compounds in red onions also lower LDL cholesterol & triglycerides while boosting HDL levels. They are associated with improving cell membrane function in red blood cells and improving oxygen utilization. This improves cardiovascular function as well as fat metabolism.
Rich in Anti-Oxidant PhytoNutrients
Red onions are also a rich source of the flavonoid anti-oxidant quercetin and the polyphenol anti-oxidant anthocyanin. These anti-oxidants prevent the oxidation of dietary and cellular fatty acids. They are very powerful free radical scavengers that neutralize cancer cell growth and dramatically reduce whole body inflammation.Studies have shown that consuming quercetin from onions was much more effective than taking quercetin extracts in supplement form. The body is able to better recognize the nutrient when it is in a natural form and has other synergistic components associated with it.
Red onions are also a fantastic source of chromium which lowers blood sugar and enhances cellular insulin sensitivity. Nearly 50% of the US population is deficient in chromium which is greater than any other developed nation. This is due to over cropping that has stripped the land of chromium and processed food consumption. Chromium deficiencies lead to diabetes and heart disease.
The anti-oxidant flavonoids are extremely rich in the outer layers of the onion. Many people will peel off the first few layers and lose much of these critical nutrients. Be sure to utilize the outer, fleshy edible portions as much as possible. Overpeeling, by taking off the outer 2 layers of flesh will cost one about 20% of its quercetin and over 75% of its anthocyanins.
Simmering onions in a soup or broth will damage some of the anthocyanins but not the quercetin. The quercetin moves into the soup or broth. The lower the heat the more nutrients will be contained in the soup or broth.
Studies have shown that 4-7 servings of red onions each week (equivalent to about 2-3 onions) has been associated with the greatest benefit in reducing colorectal, oral, laryngeal, esophageal & ovarian cancer.
Red onions should be stored in a cool, dry area with good airflow. Until they are opened they should not be stored in a refrigerator or plastic bag as both of these have been shown to speed up spoilage. Once opened, it is best to store in refrigeration. Avoid any onions that are wet, soft, bruised or have dark spots or mold on them.
Sources for this article include:
http://www.whfoods.com/genpage.php?tname=foodspice&dbid=45
http://www.drweil.com/drw/u/ART02868/chromium.html
http://www.produceoasis.com/Items_folder/Vegetables/RedOnion.html
7 Ways To Eradicate Cellulite
7 Natural and Easy Steps to Eradicate Cellulite
 It is what some women consider to be the bane of their existence! They employ various tricks to try to hide it, spot reduce it, cover it up and some even go through such extents as having it sucked out and even burned off!! The much talked about affliction is CELLULITE! It affects any age, shape and size!
Virtually anyone can have cellulite. It doesn’t matter if you’re thin as a rail or curvy, whether you’re a couch potato or gym rat. And once you get it, it’s a royal pain in the bum to get rid of it! However, don’t lose hope because there is a surefire way to rid yourself of it for good!
First off, one must understand what cellulite is. It’s basically toxins trapped in fat cells. That’s it... no “special kind of fat” like some would lead you to believe, and it’s not due to a “malfunctioning body” either. It can be eradicated, you just have to know HOW to fix it, and fix it for good! Women are more prone to it due to our fluctuating hormones – too much estrogen allows us to store fat, which is the main place toxins are stored!
The first step is to stop taking in toxins that are causing it. That would be processed foods (especially wheat and dairy), cooked fats (which are basically rancid with the exception of a few) and sugars. You can go a step further and adopt an organic diet to further relieve your body of toxic burdens. Then employ my 7 easy tips for eradicating cellulite and before you know it you’ll be proud to show off your body.
1. Flush out your body! Put down those diet sodas and coffee, they'll only do more harm than good. Instead drink pure fresh water - even better with a squeeze of lemon. If you're so inclined, a few fresh pressed juices and green smoothies will really assist in flooding the body with nutrients while flushing toxins (alkalinity is the key here).
2. Get your lymph moving. Lymph is a clear fluid that carries waste & toxins out of the body - cellulite = waste. Clear the waste and banish cellulite. In addition to Step 1, the top ways to move lymph is by walking, exercising on a rebounder and skin brushing.
3. Clean up your diet. Toxic foods = toxic bodies. Choose unprocessed and preferably organic foods that will “move through” your body as opposed to “sludging” it up!
4. Brush brush brush. Every day you brush your hair and your teeth - now it’s time to brush you body! Dry Skin brushing is PHENOMENAL for detoxing the body and minimizing cellulite.
5. Alkalize. Combining Steps 1 & 3 – By choosing fresh fruits and vegetables you will alkalize your body, which in turn will keep it running smoothly. An alkaline body is lean, never puffy, full of energy and glowing.
6. Get SUPER. Infuse your body with high octane nutrients in the form of superfoods. Nutrient dense foods not only cleanse, alkalize and heal your body but will allow your body to get the most out of the foods you eat.
7. Put your skincare products on a diet! Shun chemical laden skincare and choose only natural, organic products. Chemicals absorb through your skin, getting trapped in fat cell which in turn only make issues worse. Chemicals promote fat and toxin storage, eliminate the vicious cycle by only choosing natural, organic and chemical free skincare.
Published June 28, 2012 at 1:15 PM
Another Recipe For Raw Sauerkraut

While this post is dedicated to the recipe for my raw kraut, click here to read my post about the health benefits of raw, fermented sauerkraut.
 Raw Sauerkraut:
Roasted Jalapeño & Garlic
Yield: Approximately 32 servings.Click here for estimated nutrition facts.
(flavor variations for a plain and other versions are listed at the end of the recipe)
NOTE: You’ll need to have a large pot or mixing bowl, 2 wide-mouthed 32oz sterilized glass jars, and two pinch bowls or shot glasses that fit inside the top of the glass jars on-hand for this recipe. If you have a sauerkraut crock or other fermentation containers you won’t need the glass jars.
Yield: 2, 32-oz jars.
Ingredients:
- 1-2 jalapeño peppers
- 1 large head of green cabbage, sliced into thin strips (set large outer leaves aside)
- 1 Tbsp unrefined sea salt (I like Redmond Real Salt)
- 2 large carrots
- 2-4 cloves of garlic (2 if large, 4 if smaller)
- Black pepper to taste – a few grinds will work
Preparation:
- Place the jalapeño(s) over an open gas flame or on a grill, turning every minute or so until the skin is blackened and blistered. Remove the pepper from the heat and peel the skin off under cool running water.
- Slice the peeled pepper(s) and remove the seeds to your taste. The more seeds you leave, the spicier the recipe will turn out. Set the peppers aside.
- Place 1/3 of your sliced cabbage into your large bowl and sprinkle 1 Tsp of the salt over it. Using your hands squeeze and stir the cabbage until some of the water content begins to come out of it and the cabbage seems wet.
- Repeat this process adding the remaining cabbage and salt 1/3 at a time to the bowl. Squeeze and stir the mixture until you can see water running off of the cabbage. This will take time and elbow-grease, so be ready to get your hands involved.
- Peel and then grate the carrots on a box grater or in a food processor.
- Peel and then finely slice the garlic.
- Add the shredded carrots, garlic, jalapeños and black pepper to the mixture and combine with your hands.
- Fill the 2 jars evenly, pressing the mixture down so that water releases and raises above the line of the vegetables. Continue doing this until the jars are filled with about 2″ of space remaining at the top.
- Wedge the large outer leaves of the cabbage you had set aside into the top of the jars so that the mixture is underneath it and the water level raises above the flat cabbage leaf. You will want to use a small pinch bowl or a shot glass as additional weight to keep the mixture down.
- Set the filled jars aside on a cookie sheet or in any other large, flat container with an edge so that if there is any spillover you keep it contained. Set the jars/cookie sheet aside in a secure place at room temperature where they will not be disturbed.
- Check on your raw sauerkraut every day or two to make sure that the water level has remained above the vegetables and that no vegetables are touching the surface and coming into contact with air. The fermentation process happens under water, so if you do see anything touching the surface, use a clean spoon to remove it. You may also see some growth or mold form around the top of the liquid- this is normal but it’s best to remove it when you see it. If you need to add liquid to the jars, add some fresh water to make sure that everything is below a water line. The weights should a lot help with this.
- After about one week, remove the weight and top piece of cabbage from the kraut, remove a thin layer of the top of the kraut and give it a taste. It should be sour but probably not “there” yet. Allow the sauerkraut to sit for at least 2 weeks and taste it periodically as you wish to check on it.
- Once the sauerkraut tastes as you like it, place the lid on it and store it in the refrigerator. It will last for several months while refrigerated and will not continue to ferment further.
Variations:
- Plain raw sauerkraut: use just cabbage and salt.
- Traditional raw sauerkraut: use cabbage, salt and caraway seeds (about 1Tbsp for this recipe).
- Sweet and tangy sauerkraut: use red cabbage, salt, raisins or currants, cinnamon and fennel seeds.
- Seasonal fall sauerkraut: use cabbage, salt, green apples, sliced fennel and leeks.
- FODMAP-free carrot-kraut: use just carrots in place of cabbage and salt.

GAZPACHO-Hispanic Kitchen
Gazpacho

Yields 6-8 servings
Ingredients:
2 pounds fresh tomatoes, preferably Roma, chopped and seeded
2 green onions, chopped
1 cucumber, peeled and cut into small pieces
1 garlic clove, chopped
½ red bell pepper, chopped, seeded and deveined
1 teaspoon honey
1 teaspoon fresh oregano
1 teaspoon fresh cilantro
1 teaspoon fresh basil
1 cup tomato juice or ice water
2 slices of day-old bread (no bread for us)
2 tablespoons sherry vinegar
¼ cup extra virgin olive oil
Salt and pepper to taste
Directions:
1. Soak the slices of bread in water.
2. Place the vegetables, herbs, and honey in a blender (in batches, if necessary). Add a little water or tomato juice and blend until mixture is smooth.
3. Add the soaked bread, vinegar, oil, salt and pepper to taste and blend against until all ingredients are mixed well and emulsified.
4. Pour in to a large bowl, mix well and adjust the seasonings.
5. Refrigerate for at least 2 hours.
6. To serve: Pour gazpacho in to a soup bowl, drizzle with olive oil, and serve with cassava bread topped with finely chopped tomatoes and basil.
Dr. Bronner's Castile Soap
The Magic and Reality of Dr. Bronner's Castile Soap

Are the claims right? Some of them are. It's my new favorite under-the-sink house and body cleaning tool. First of all, you can buy Dr. Bronner's on Amazon and other sites, and also at your local health food store and even at Target! I found Amazon's prices to be the cheapest, and even got free shipping with free super saver shipping (but had to be very patient as I waited for a week for it come in - it was a long week!). I read a gallon could last 6 months to a year, depending on how you use it. I think mine will last a year or longer!
Dr. Bronner's is so cool because it comes in many different scents - Lavender, Almond, Peppermint, Tea Tree Oil , Eucalyptus, Rose, and Citrus. It also comes in Baby Mild to use on your baby. I bought Peppermint and Almond. Surprisingly, I have not liked the almond scented one and won't buy it again. It smelled strange to me, especially as a cleaning product. I'm very happy with the peppermint one, but will buy lavender next because I've read many good things about it.

But, you don't necessarily have to buy Dr. Bronner's Castile Soap. There are many other companies that make it, but I love that this one is made from all organic ingredients and is fair trade. Double bonus.
Here's how I use my Dr. Bronner's:
Body Wash: I recycled an old bottle and filled it 3/4 with filtered water, and 1/4 Castile Soap. It works really well as a body wash for me, but I wouldn't recommend it for the kids. It is absolutely NOT tear free and the peppermint one tastes, as Kevin (the hubs) says, "like bitter menthol." Ugh, gross! Kevin likes bar soaps, so I bought him Kirk's Castile Soap from Amazon so he can have his bar. Although, like many others say, it does feel a wee bit too tingly in the unmentionable areas. Don't say you haven't been warned! UPDATE - I instead have been using a baking soda body scrub to clean my birthday suit, see my post on that here.
Hand Soap: I use about 7/8 filtered water and 1/8 Castile Soap in my hand soap, although you can use more if you like it. It suds up really well, even with this little. Add 20-30 drops of Tea Tree Oil to make it antibacterial soap.
All Purpose Household Cleaner: I use it as an ingredient in a homemade household cleaner. I got the recipe from the book, "Clean House, Clean Planet" and wrote a post about it! You can also use it in a very diluted form to mop the floors and clean other surfaces in the house. When mixed with baking soda, it makes a great cleaner in the kitchen to use on countertops.
You could also fill a spray trigger bottle with mostly water, then add 1-2 tablespoons of Dr. Bronner's to use as a household cleaner. Add a tablespoon of baking powder for scrubbing action! Or just dab some of the soap on a washcloth or sponge and scrub away - great for cleaning smudges off of cabinets, walls, etc.
Homemade Laundry Detergent: This is one of my favorite ways to use Dr. Bronner's. I use only a 1/2 cup in 2 gallons of detergent, so it goes a long way! It makes detergent SO cheap and it just makes it even better that it's green! (More on that coming soon!)
An Overnight Dish Cleaning Soak: Dr. Bronner's is AWESOME at getting hard water stains, stuck on grease and food off the bottom of pots, pans, glassware, and baking dishes. I just squirt enough straight out of the bottle to cover the bottom of the pot or pan and let it sit overnight. The next morning I rinse it out and voila! Every time I've done it the stains are completely gone!
The Not-So Magical Side of Dr. Bronner's
I would not use it as a shampoo like the bottle suggests. It's way cheaper to make your own from baking soda, and it's gentler on your hair. I have a friend who tried it on her kids' hair and their hair was extremely tangly afterwards.
We tried it as a dishwashing soap to hand wash dishes in the sink but didn't like it at all. It doesn't create any suds and I had a hard time getting grease and food off of the dishes. Now, it would work if left to soak for several hours or overnight. Green cleaners like this one just take longer to work, but I don't always have that kind of patience!
This post was shared at:
Tips and Tricks at Stringtown Home
Transitioning to Paleo
7 Tricks to Transition to a Paleo Diet
 Also called the Caveman, Primal, Hunter/Gatherer and Stone Age Diet, implementing a Paleo lifestyle may seem daunting to you at first, but it’s easier than you may think.
Living within a Paleo Framework means eating a widely varied diet consisting of:
- High quality animal protein (think wild meats, pastured chicken and 100% grass-fed beef)
- Healthy fats (from both animal and vegetable sources)
- Vegetables (of all colors, shapes and sizes)
- Fruit
- Nuts and seeds
When moving from a diet of processed grain products to a Paleo diet, the trick is to crowd out the grains, legumes and dairy with healthy veggies, protein and fat in a way that flows with your usual daily routine. Avoiding deprivation is a must—the more you feel deprived, the less you will want to follow through. That’s how most conventional diets fail. Making the shift toward a Paleo diet is a lifestyle change. Something that’s meant to last forever should be easily sustainable and forgiving.
Here are some crucial tips and tricks to make your transition to Paleo easier:
‘1. More Veggies Diet’ vs. ‘No Bagels Diet’
Focus on the positive to avoid feelings of deprivation. Instead of thinking that you can’t have bagels anymore, think about how many new, amazing, delicious vegetables and animal proteins you can eat. Not to mention all of the coconut products: Coconut oil, coconut butter, coconut flakes…
2. Find an Animal Protein Source that You Love and Buy the Highest Quality that You Can Afford
There are so many nutritional benefits from eating grass fed or pastured meat. Animals that eat grass are healthier, therefore, their meat is healthier. Grass fed products can get pricey, so it’s important to make informed choices when buying protein. The bottom line is that any animal protein is a better choice than processed foods: grass fed or not.
3. Learn to Love Fat
Fact: Fat does not make you fat. In the 1980s, low fat diets became all the rage. Fat was demonized, and we started to believe that dietary fat makes us fat. This simply isn’t true. It’s actually the excess carbohydrates/sugars in conjunction with dietary fats that actually make you fat. Learn to love fat in the form of animal protein, avocado, coconut, nuts and seeds. Not only is fat the best source of fuel; it also makes your meals more satisfying!
4. Beware of Paleo Baked Goods
Although I have enjoyed many a Paleo Banana Muffin, these “paleo” baked goods miss the point. The point is to reprogram your body to respond to high quality, whole foods and to create the most stable and efficient internal environment possible. Paleo baked goods just replace your bad habit, calorie dense, nutritionally deficient, refined, carbohydrate crutches. Use your best judgment, and consider Paleo baked goods and desserts to be those “sometimes treats.”
5. Let Go of Your Meal Boundaries
You CAN eat dinner leftovers for breakfast and breakfast foods for lunch. Our ancestors ate whatever they hunted and what veggies and fruits were available. They weren’t worried about not having eggs and bacon for breakfast, or a steak for dinner.
6. Get Support
Find a community of people going through the same transition, and support each other. There are hundreds of Paleo blogs and Facebook pages out there where people share recipes and support each other on this Paleo Journey.
7. Find Balance